
TL;DR:
- Living with unexplained symptoms can be frustrating, but hair sample testing offers a convenient, non-invasive way to identify dietary triggers from home. Proper preparation, careful collection, and correct packaging are essential for accurate results, with guidelines emphasizing cleanliness, appropriate materials, and timely posting. Following these steps ensures reliable testing and quicker access to personalized solutions for your health concerns.
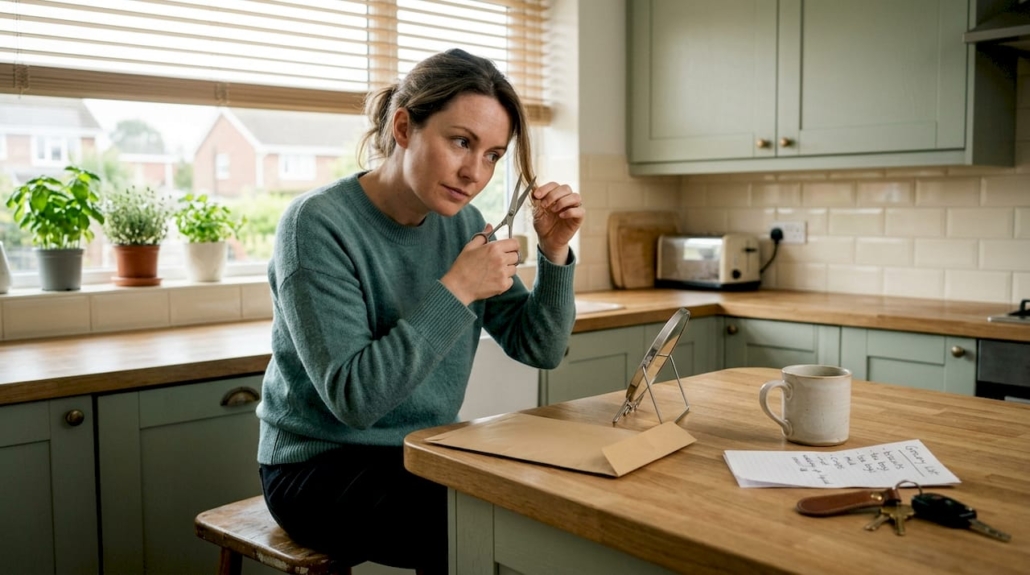
Living with unexplained bloating, skin flare-ups, persistent fatigue, or digestive discomfort can be incredibly frustrating when you have no clear answers. Hair sample testing offers a genuinely non-invasive way to investigate potential dietary triggers from the comfort of your own home, without uncomfortable blood draws or lengthy clinic appointments. This step-by-step guide walks you through exactly what to prepare, how to collect your sample correctly, and how to package it safely so your results are as accurate and reliable as possible.
Table of Contents
- What you need before collecting a hair sample
- Step-by-step instructions for collecting your hair sample
- How to package and submit your hair sample safely
- Double-checking your sample: troubleshooting and fixes
- What most guides miss about successful hair sample collection
- Explore easy at-home food intolerance testing
- Frequently asked questions
Key Takeaways
| Point | Details |
|---|---|
| Prepare properly | Gather clean scissors, a dry envelope, and follow the lab’s requirements before starting. |
| Collect correctly | Cut 5–10 clean hairs from near the scalp—never pull or use dyed hair for highest test accuracy. |
| Package for safety | Dry and label hair samples and send in a paper envelope, not plastic, to avoid contamination. |
| Double-check before posting | Review your sample for quantity, cleanliness, and correct labelling to avoid delays. |
| Home testing is simple | With the right steps, you can confidently collect hair samples and uncover your food triggers without leaving home. |
What you need before collecting a hair sample
Now that you recognise how easy it can be to get started, let’s make sure you have everything in place for a hassle-free collection.
Before anything else, it helps to understand that not all hair tests are created equal. Different types of testing require slightly different amounts of hair. A food intolerance test using bio-resonance technology (a method that analyses the energetic frequencies in hair strands to identify potential sensitivities) has far simpler requirements than specialist medical panels. Knowing which test you’re taking means you can collect exactly the right amount without second-guessing yourself.
Here’s a quick comparison so you can see at a glance what’s involved:
| Test type | Strands required | Length required | Notes |
|---|---|---|---|
| Food intolerance (bio-resonance) | 5–10 strands | 2–3cm minimum | No root needed |
| Cortisol analysis | 100mg or 2mm thickness | At least 3cm | Higher quantity needed |
| Mineral and nutrient analysis | 100mg or more | At least 3cm | Clean, unprocessed preferred |
| Environmental sensitivity test | 5–10 strands | 2–3cm minimum | Same as intolerance test |
As you can see, why hair samples matter for food intolerance testing is partly because the process is so accessible. According to cortisol testing guidance, for intolerance tests 5 to 10 strands suffice, whereas cortisol or mineral analysis may require at least 3cm length and 2mm thickness or 100mg. Food intolerance testing is genuinely the most straightforward option available.
Essential materials to gather beforehand:
- A clean pair of small scissors (nail scissors work well)
- A plain white paper envelope
- A pencil or ballpoint pen for labelling
- Clean, dry hands (wash and dry thoroughly before handling your sample)
- Your test order details or reference number
Pro Tip: Wash your hair the evening before you plan to collect your sample, and avoid applying any styling products, oils, or conditioners on the day of collection. Clean hair free from product residue gives the most reliable result.
Step-by-step instructions for collecting your hair sample
Having set aside the right materials, you’re now ready to collect your sample. Follow these straightforward steps for best results.
Many people assume collecting a hair sample is tricky. It really isn’t. The most important thing is staying calm, working carefully, and following the steps in order. Accuracy here directly affects the quality of your at-home testing accuracy, so a few minutes of careful preparation is well worth it.
Step 1: Wash and fully dry your hair
Wash your hair as normal, then allow it to dry completely. Damp hair can introduce moisture into your sample, which risks contamination or degradation during transit. Air drying is fine; just make sure no moisture remains.
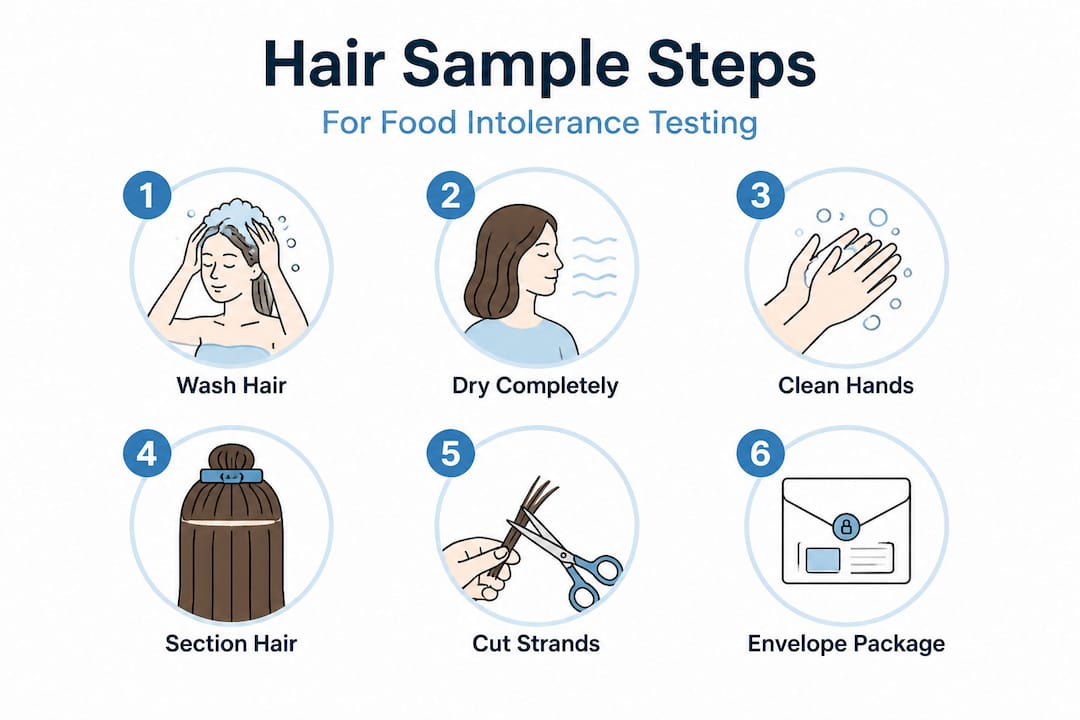
Step 2: Ensure your hands are clean
Wash your hands with plain soap and rinse thoroughly. Avoid hand creams or moisturisers before handling the sample, as these can transfer to the hair strands.
Step 3: Section a small area of hair at the back of the head
Use your fingers to section a small area of hair from the back of the head, near the nape of the neck. This region tends to have consistent growth and is less affected by environmental damage or heavy product use.
Step 4: Cut close to the scalp
Using your clean scissors, cut 5 to 10 strands of hair as close to the scalp as possible, aiming for a length of at least 2 to 3cm. You are cutting, not pulling. Cortisol testing guidance confirms that for intolerance tests, 5 to 10 strands at the correct length are entirely sufficient, while other specialist tests may need greater volume.
Step 5: Transfer to a clean paper envelope immediately
Place the strands directly into your pre-labelled paper envelope. Avoid touching the cut ends more than necessary, and do not place the hair on a surface before transferring it.
Step 6: For children or those with very short hair
Children’s hair can be collected using the same method, simply scaling down to the minimum strand count. For individuals with very short hair (under 2cm), collect as many strands as possible from the nape of the neck and contact the lab for specific guidance. Most labs can still process very short samples for bio-resonance food intolerance testing.
Pro Tip: Collect your sample in natural daylight if possible. Good visibility helps you see exactly what you’re cutting and ensures you avoid accidentally including loose debris or multiple hairs from different people.
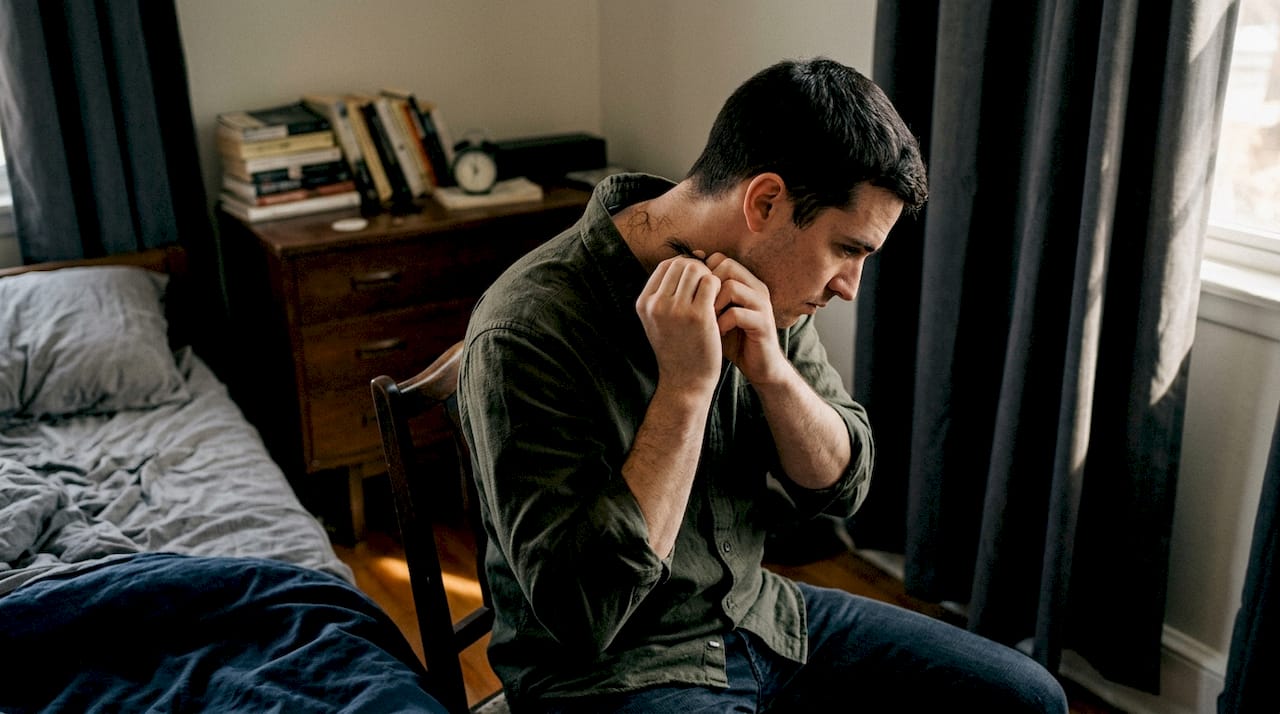
Important warning: Never pull hair out by the root. Pulling causes unnecessary discomfort and is not required for bio-resonance food intolerance testing. Do not use freshly dyed or chemically treated hair, as residues from treatments may interfere with the sample. If your hair has been bleached, permed, or coloured in the past two weeks, wait until new growth has appeared near the scalp. Avoid mixing hair from more than one person in a single envelope. Even a tiny cross-contamination can affect your results.
How to package and submit your hair sample safely
Once your hair is collected, proper packaging is crucial to verify your results are reliable and timely.
Collecting the hair correctly is only half the job. How you package and post it matters enormously. A poorly packaged sample can arrive damp, tangled, or labelled incorrectly, causing delays or requiring you to resend an entirely new sample. Getting this right the first time saves you days and protects the integrity of your test.
Ensuring your sample is ready for packaging:
Before placing hair into the envelope, do a final check. The strands should be visibly clean, dry, and free from knots or excessive product residue. If you can see oily or sticky hair, it’s worth re-washing and waiting for it to dry fully before proceeding. Rushing at this stage is the most common reason samples are flagged at the lab.
Why paper envelopes, not plastic bags:
Always use a paper envelope rather than a plastic ziplock or sandwich bag. Plastic creates a sealed, humid environment, which can cause moisture to build up around the hair strands during transit. This risks mould, degradation, or contamination. Paper allows the sample to breathe safely. Reviewing guidance on preparing for at-home testing confirms this as a consistent best practice.
Here’s a clear comparison of correct and incorrect packaging:
| Packaging method | Suitable? | Reason |
|---|---|---|
| Plain white paper envelope | Yes | Allows ventilation, prevents moisture build-up |
| Small paper fold inside envelope | Yes | Keeps strands together without static |
| Clear plastic bag | No | Traps humidity, risks contamination |
| Aluminium foil wrap | No | Can cause static and physical damage to strands |
| Sticky tape over sample | No | Adhesive residue can contaminate sample |
| Tissue or kitchen roll wrap | No | Fibres can mix with hair strands |
Labelling your sample correctly:
Write your full name, date of birth, order reference number, and the date of collection on the outside of the envelope. Never write directly on the inside where the sample sits. Use a ballpoint pen rather than a felt-tip, as felt-tip ink can transfer and potentially affect the sample. You can follow the step-by-step food sensitivity guide for a full breakdown of what to include.
Pre-postage checklist:
- Sample contains 5 to 10 clean, dry strands
- Hair is at least 2 to 3cm in length
- Envelope is paper, not plastic
- Envelope is labelled with your name, date of birth, order number, and collection date
- You have checked the return address provided in your test kit
- You are using first class post where possible to minimise transit time
Common mistakes to avoid when posting:
- Folding or bending the envelope heavily, which can snap or damage fragile strands
- Using a rubber band tightly around the envelope
- Posting late in the week when delivery may be delayed over a weekend
- Forgetting to include your order reference, causing processing delays at the lab
- Posting from an outdoor letterbox in wet weather without a protective outer envelope
Double-checking your sample: troubleshooting and fixes
Before you send your sample, let’s make sure everything is just right. Here are the critical checks and simple fixes for peace of mind.
Even when you follow every step carefully, questions come up. That’s completely normal. The good news is that most common issues are easy to resolve before you post anything.
Quick troubleshooting checklist:
- I’m not sure I collected enough hair: Count the strands before sealing the envelope. If you have fewer than 5, collect a few more from the same area. Five is the minimum; more is always fine for bio-resonance food intolerance tests, as noted in cortisol testing guidance.
- I accidentally touched the hair a lot while handling it: If significant product residue or oils from your fingers have transferred, consider re-washing the strands gently in plain water, patting dry on clean tissue, and allowing them to air dry fully before repackaging.
- My hair is too short to easily cut: Collect from the nape of the neck, which often has slightly longer growth. Contact the lab before posting to confirm your sample is viable.
- I used the wrong envelope: Transfer the sample carefully to a plain paper envelope before posting. Do not try to post in a plastic bag.
- I forgot to include my reference number on the label: Write it on a small piece of clean paper and include it inside the envelope alongside the sample.
- My sample got wet before posting: Allow the hair to dry thoroughly in open air before resealing and posting. Never use a hairdryer directly on the sample.
- I’m worried about my hair being dyed: Freshly treated hair within the past two weeks is not ideal. Wait for some natural regrowth near the scalp and use those strands instead. Read more about managing sensitivities naturally once your results are back.
The key thing to remember is that most issues are fixable before you post. Take an extra five minutes to double-check everything. It genuinely makes a difference to how quickly and smoothly your results come back.
What most guides miss about successful hair sample collection
Most articles on this subject focus almost entirely on how many strands to collect. That’s important, of course. But in our experience supporting customers through at-home testing, the far more common cause of rejected or delayed samples is not the quantity of hair. It’s cleanliness and packaging.
We hear from customers who were meticulous about cutting exactly 10 strands, only to have used hair that was coated in dry shampoo or leave-in conditioner. The lab couldn’t process it reliably. And then there are the samples that arrive in plastic bags, slightly damp, which have degraded during a two-day postal journey in summer heat.
Here’s an honest perspective: time spent on preparation is time saved on delays. A clean, properly packaged, correctly labelled sample that reaches the lab in good condition will always produce faster, more reliable results than a larger or more carefully cut sample that’s been mishandled.
Another thing most guides gloss over is labelling. It sounds trivial, but a sample arriving without a reference number or with an illegible name genuinely does cause processing delays. Laboratories receive hundreds of samples; yours needs to be identifiable within seconds of being opened.
Finally, consider timing. Posting early in the week, ideally Monday to Wednesday, means your sample arrives and gets processed without sitting in a sorting office over a weekend. That single decision can knock one to two days off your waiting time.
Our guidance on real-world testing insights reinforces what many customers tell us after the fact: the relief of receiving clear, actionable results is absolutely worth those extra few minutes of preparation. Don’t let a small, avoidable mistake stand between you and the clarity you’re looking for.
Explore easy at-home food intolerance testing
Ready to take action? Now that you know exactly how to collect and submit your sample, the next step is simple.
At UK Food Intolerance, we make the entire process straightforward from start to finish. Browse our food intolerance test kits and order directly online, with your results delivered digitally within 48 to 72 hours of your sample arriving at our UK-based laboratory. Whether you’re looking for a focused panel or want to check over 1,100 potential triggers, explore our comprehensive test options to find the right fit for you. Not sure which foods work best for your body? Our guide to personalised diet matching shows you how your results can shape a diet that genuinely supports your wellbeing.
Frequently asked questions
How many strands of hair do I need for a food intolerance test?
Usually 5 to 10 clean hair strands are sufficient for most food intolerance tests, as confirmed by testing guidelines which note that this quantity suffices for intolerance testing. More can be included without any issue.
Does hair have to be a certain length for testing?
For most food intolerance tests, 2 to 3cm is ideal, though always check your specific lab’s requirements. Specialist panels such as cortisol or mineral analysis may require at least 3cm, but very short hair may still be usable for bio-resonance intolerance testing.
Can dyed or treated hair be used for intolerance testing?
Freshly dyed or chemically treated hair is not recommended because residues from the treatment may interfere with the sample. Use natural hair growth from closest to the scalp for best accuracy, ideally at least two weeks after your last treatment.
Should I pull hair out or cut it for a sample?
Always cut hair as close to the scalp as possible. Do not pull hair out by the root, as this is unnecessary for bio-resonance food intolerance testing and may cause discomfort.
How do I package my hair sample for posting?
Place the hair strands in a clean, labelled paper envelope, avoiding plastic bags entirely to prevent moisture build-up and contamination during transit. Post early in the week to minimise delays.










Leave a Reply
Want to join the discussion?Feel free to contribute!